基于PySide6设计有限元软件
约 1585 个字 111 行代码 10 张图片 预计阅读时间 7 分钟
前期准备工作
环境搭建
环境:
- Python:3.11.4
- Pyside6:
pip install pyside6 - Vscode
Vscode配置
Vscode配置时,网上有很多教学,这里重复之。
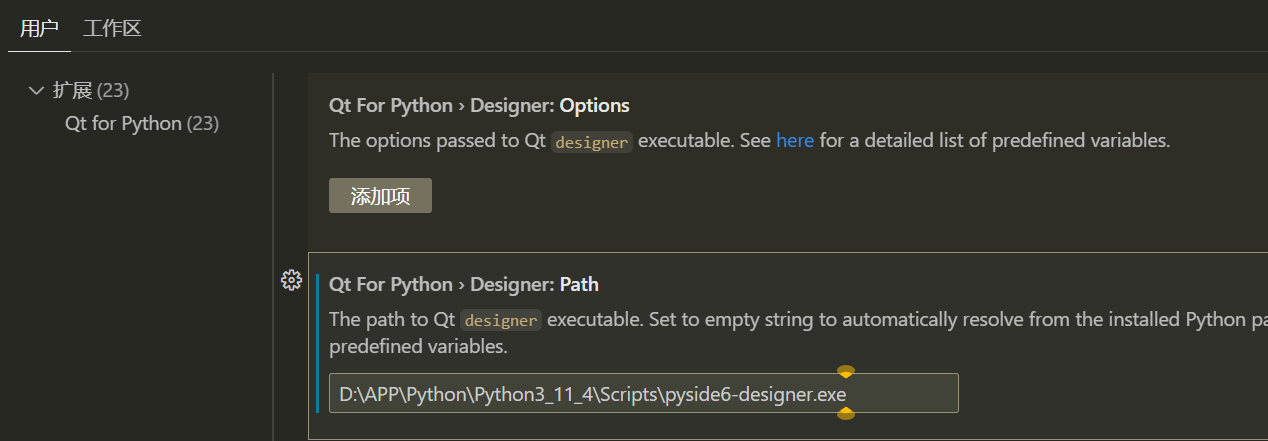
安装插件:Qt for Python,扩展设置Path路径添加designer的安装位置,这里以我的个人笔记本为例:D:\APP\Python\Python3_11_4\Scripts\pyside6-designer.exe,安装路径不清楚的话可以使用Everything进行全局搜索,输入:pyside6-designer.exe即可。
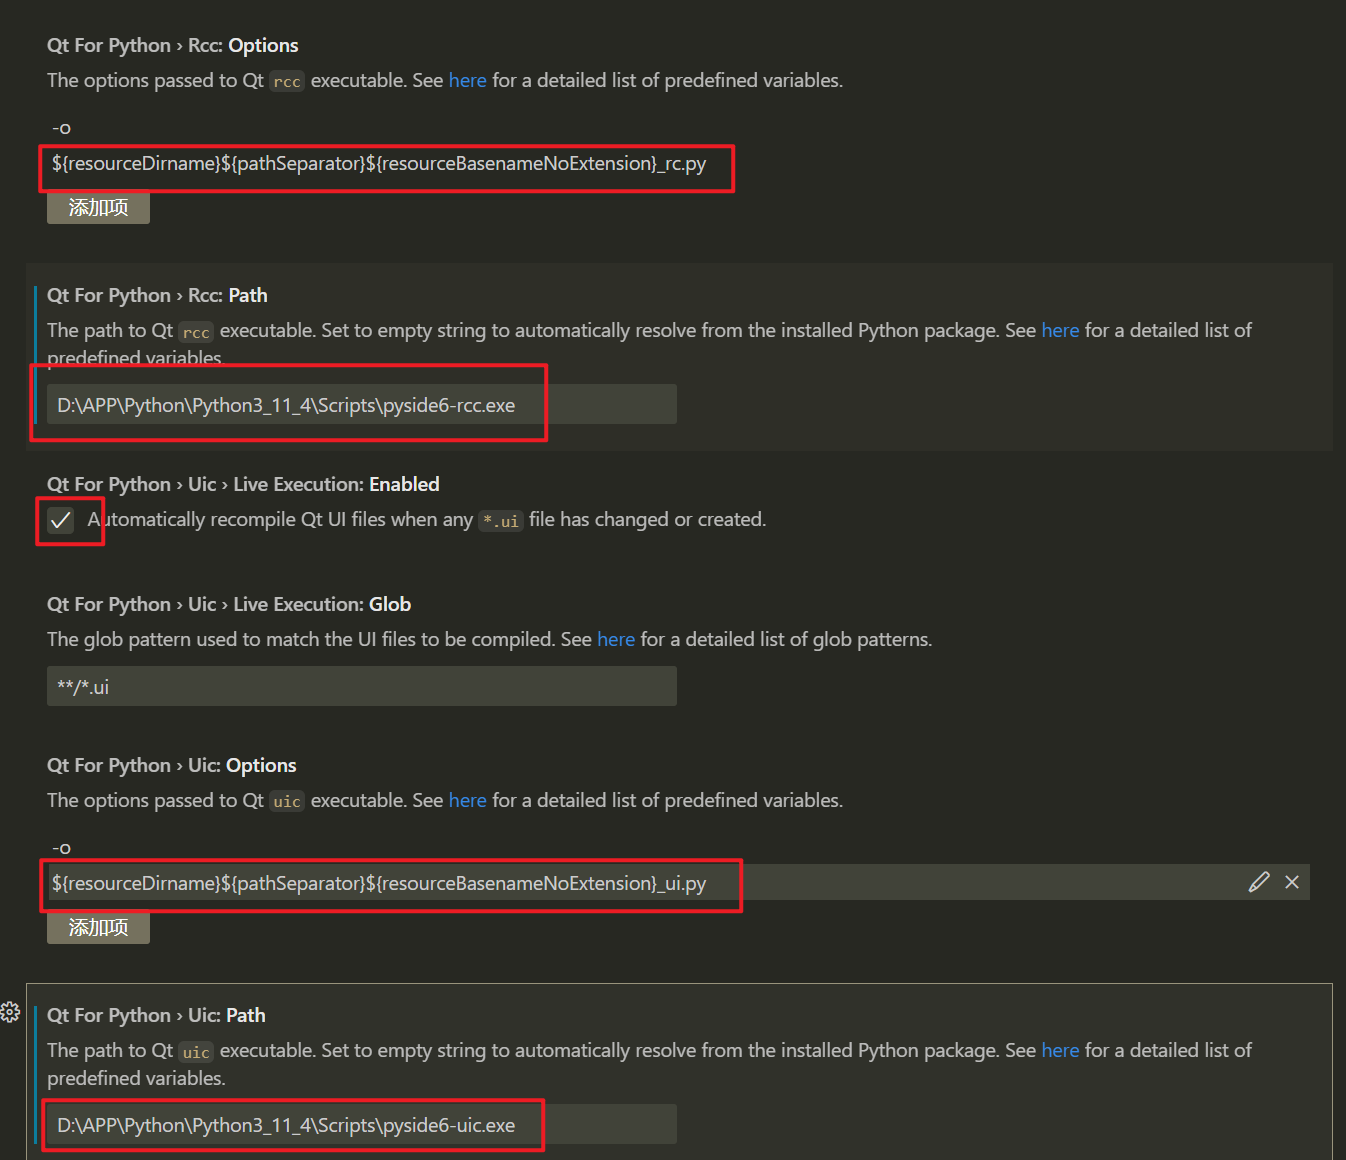
在Rcc:Option下方填入:
${resourceDirname}${pathSeparator}${resourceBasenameNoExtension}_rc.py
在Rcc:Path(以自己实际路径为准)下方填入:
D:\APP\Python\Python3_11_4\Scripts\pyside6-rcc.exe
在Uic:Option下方填入:
${resourceDirname}${pathSeparator}${resourceBasenameNoExtension}_ui.py
在Uic:Path(以自己实际路径为准)下方填入:
D:\APP\Python\Python3_11_4\Scripts\pyside6-uic.exe
在Uic:Live Execution勾选,每次ui文件更改保存后,会自动运行一次。
如下图所示:
环境测试
在工作目录中新建如下如下文件夹(个人建议):
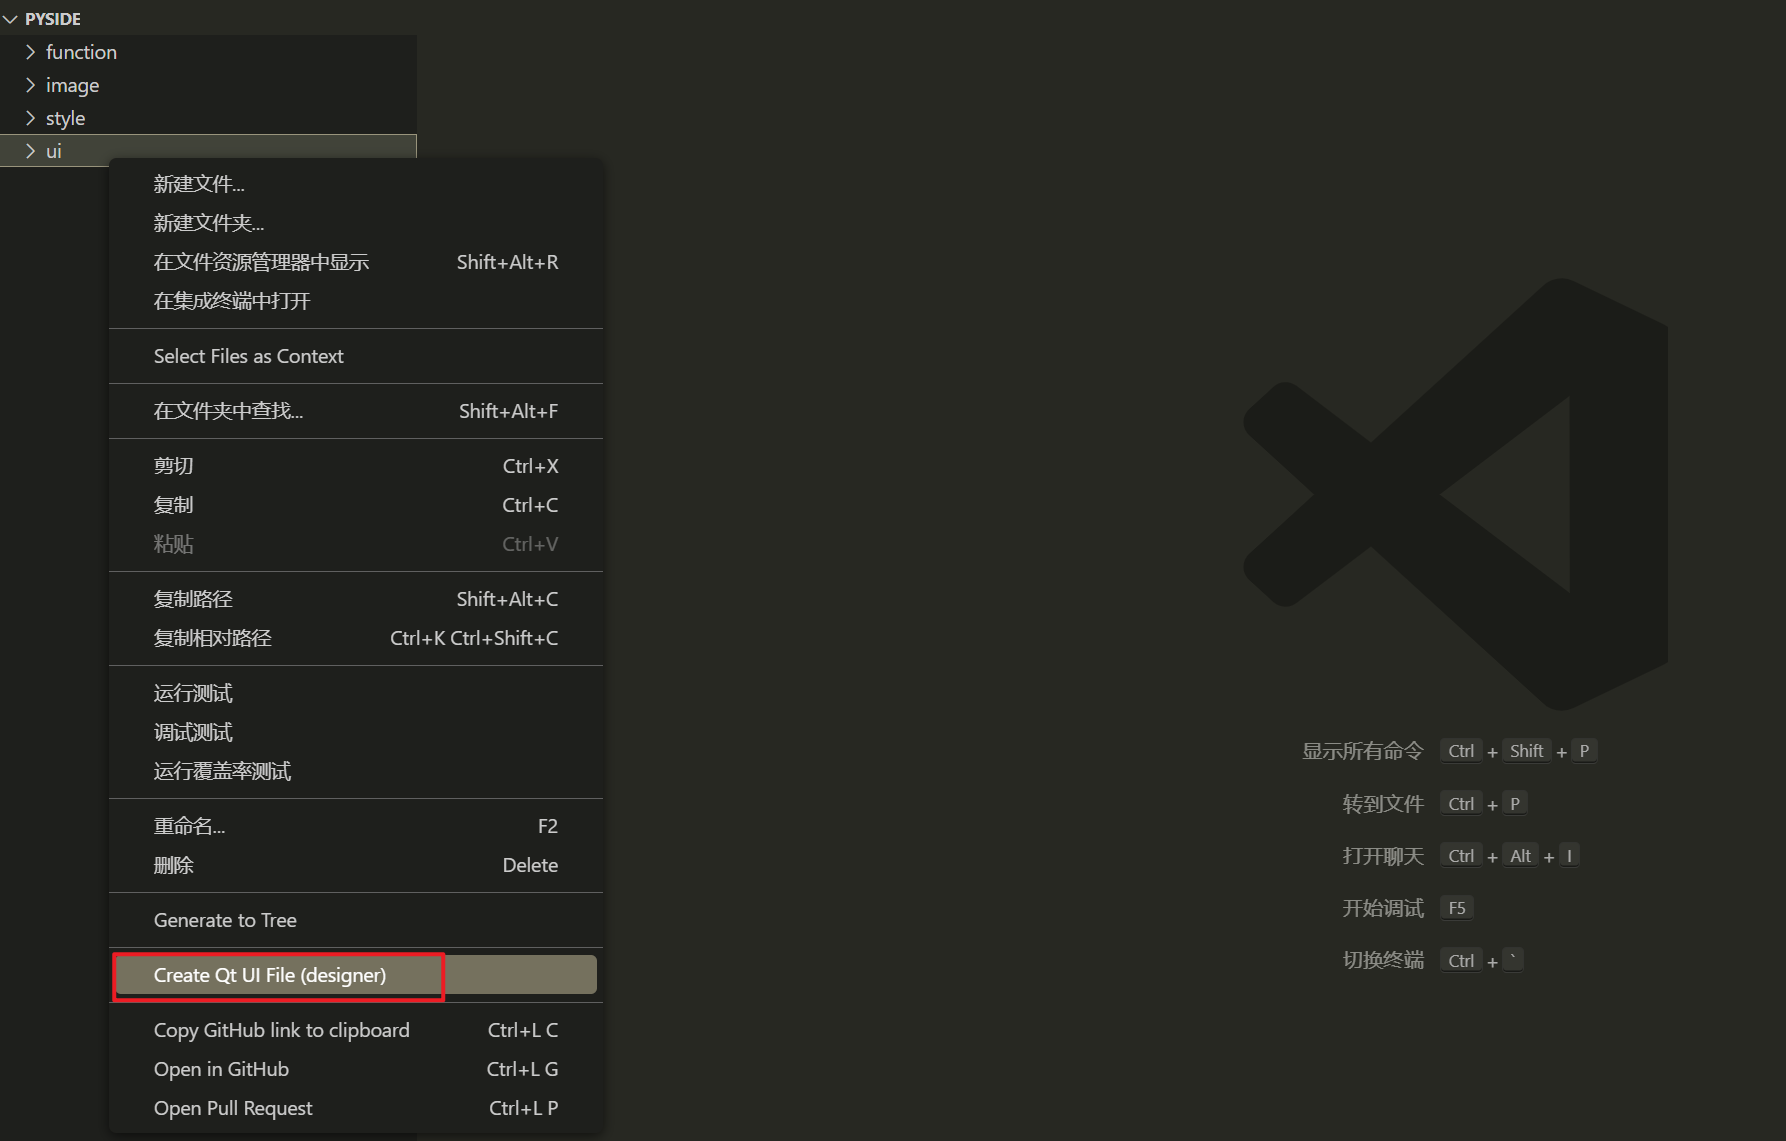
在ui文件夹右击新建ui文件:
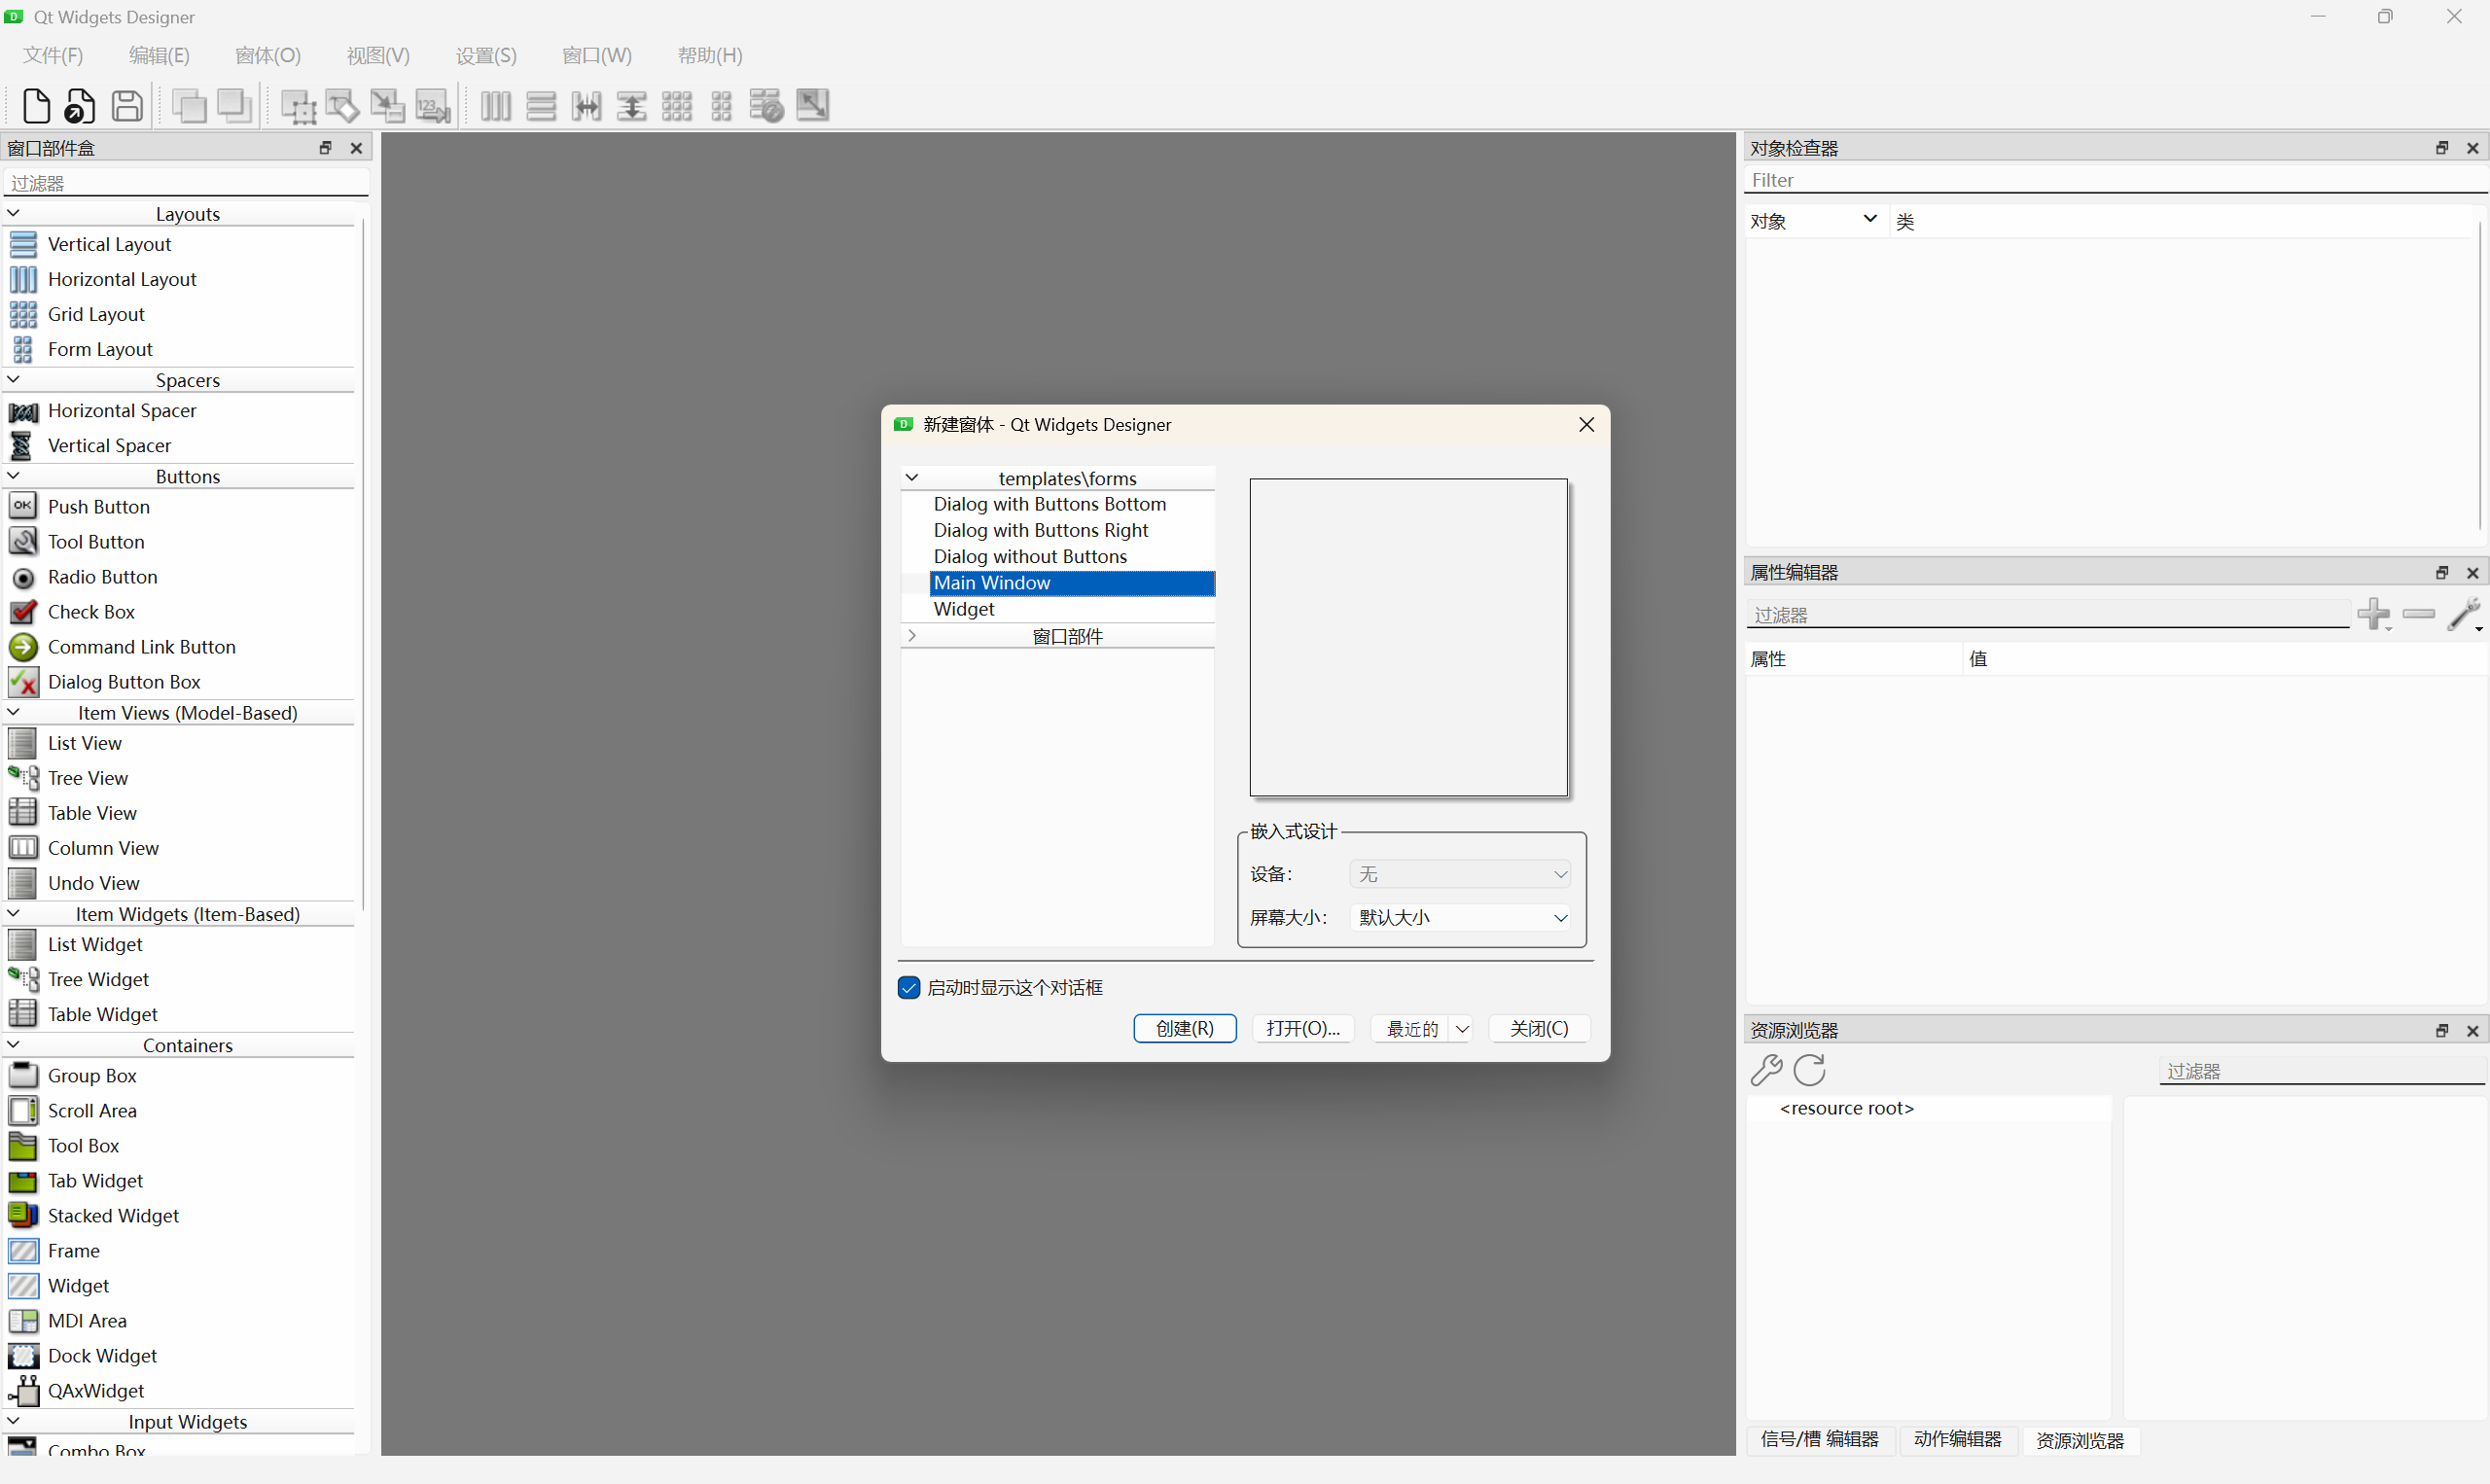
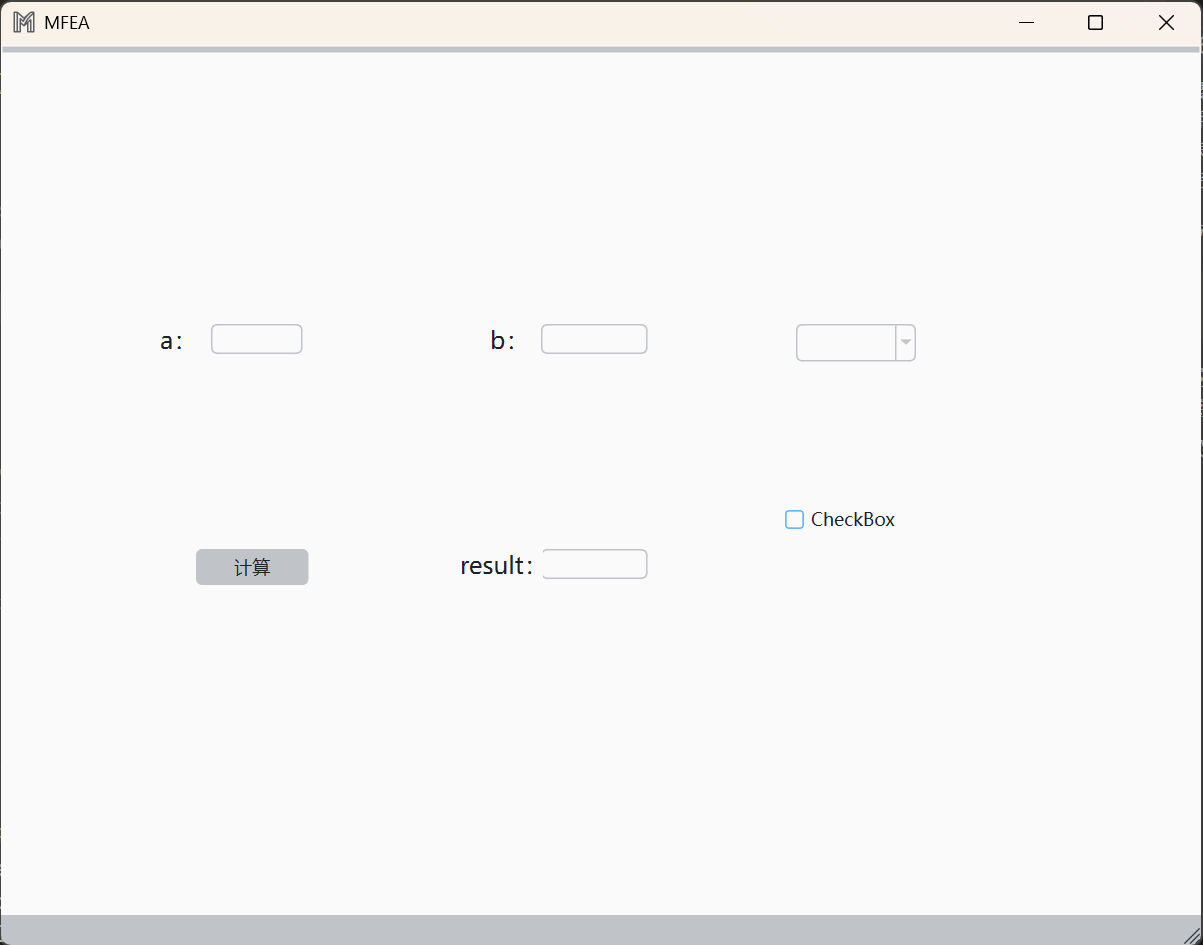
即可进入qt designer界面,新建Main Window:
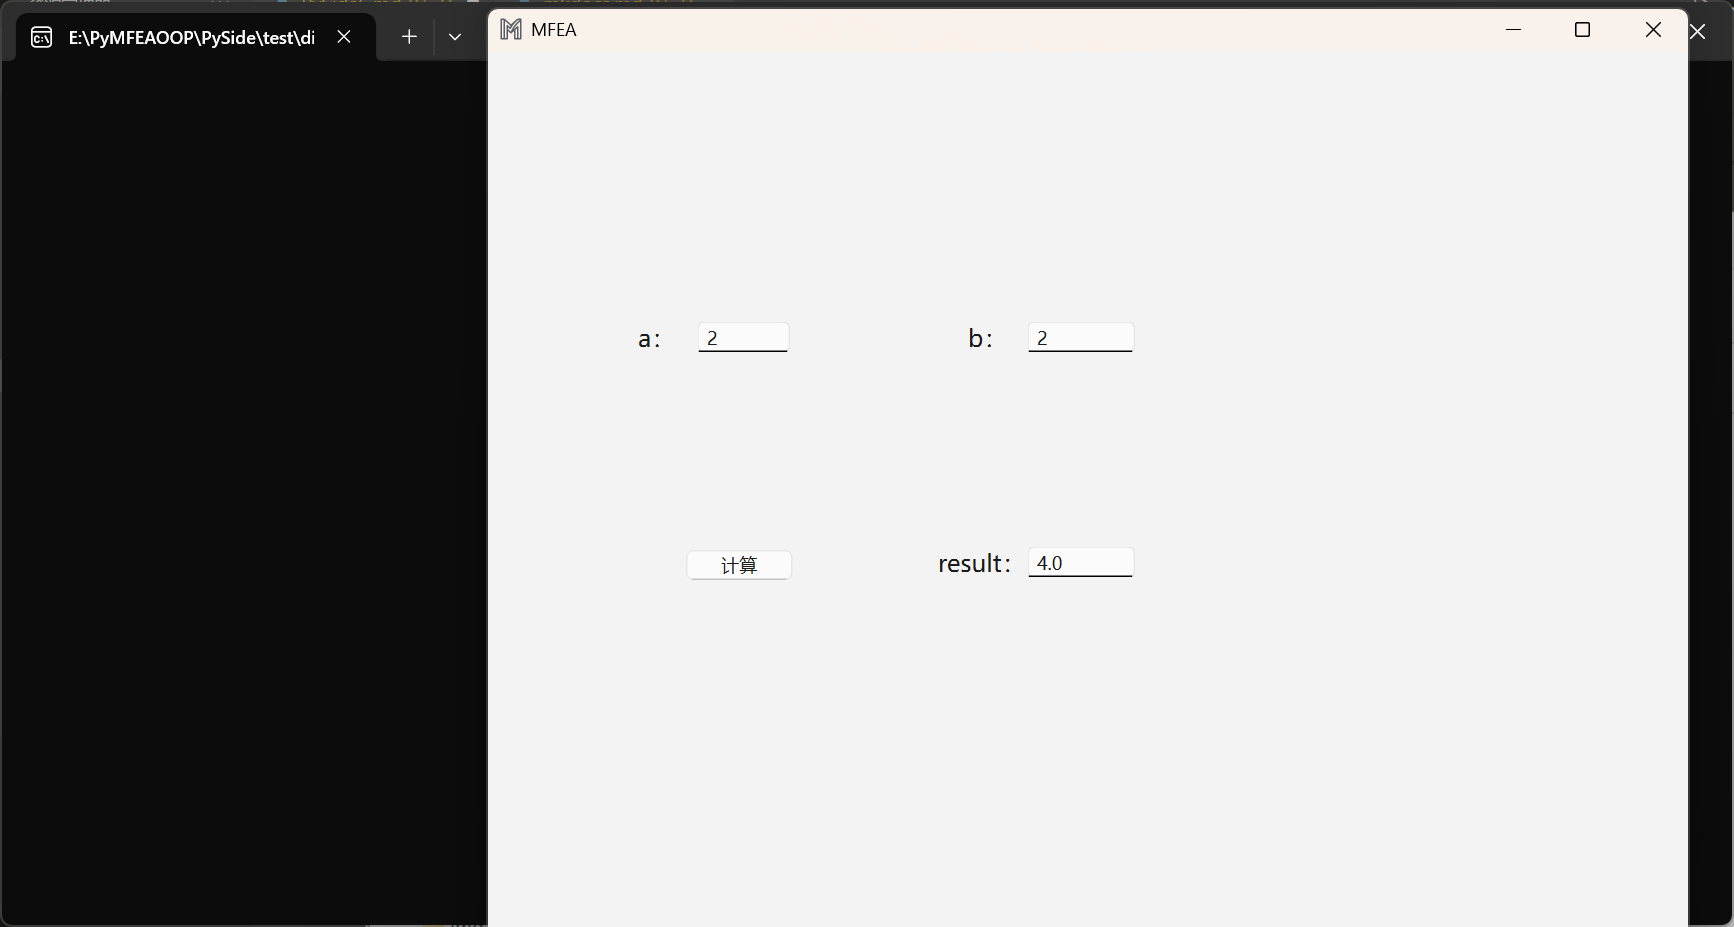
以最简单的加法计算器为例,在UI界面上添加一个按钮(Push Button)和三个Line Edit,分别代表计算按钮、参数a、参数b和计算结果c,建议养成一个好习惯:控件命名,方便在逻辑代码中进行调用。
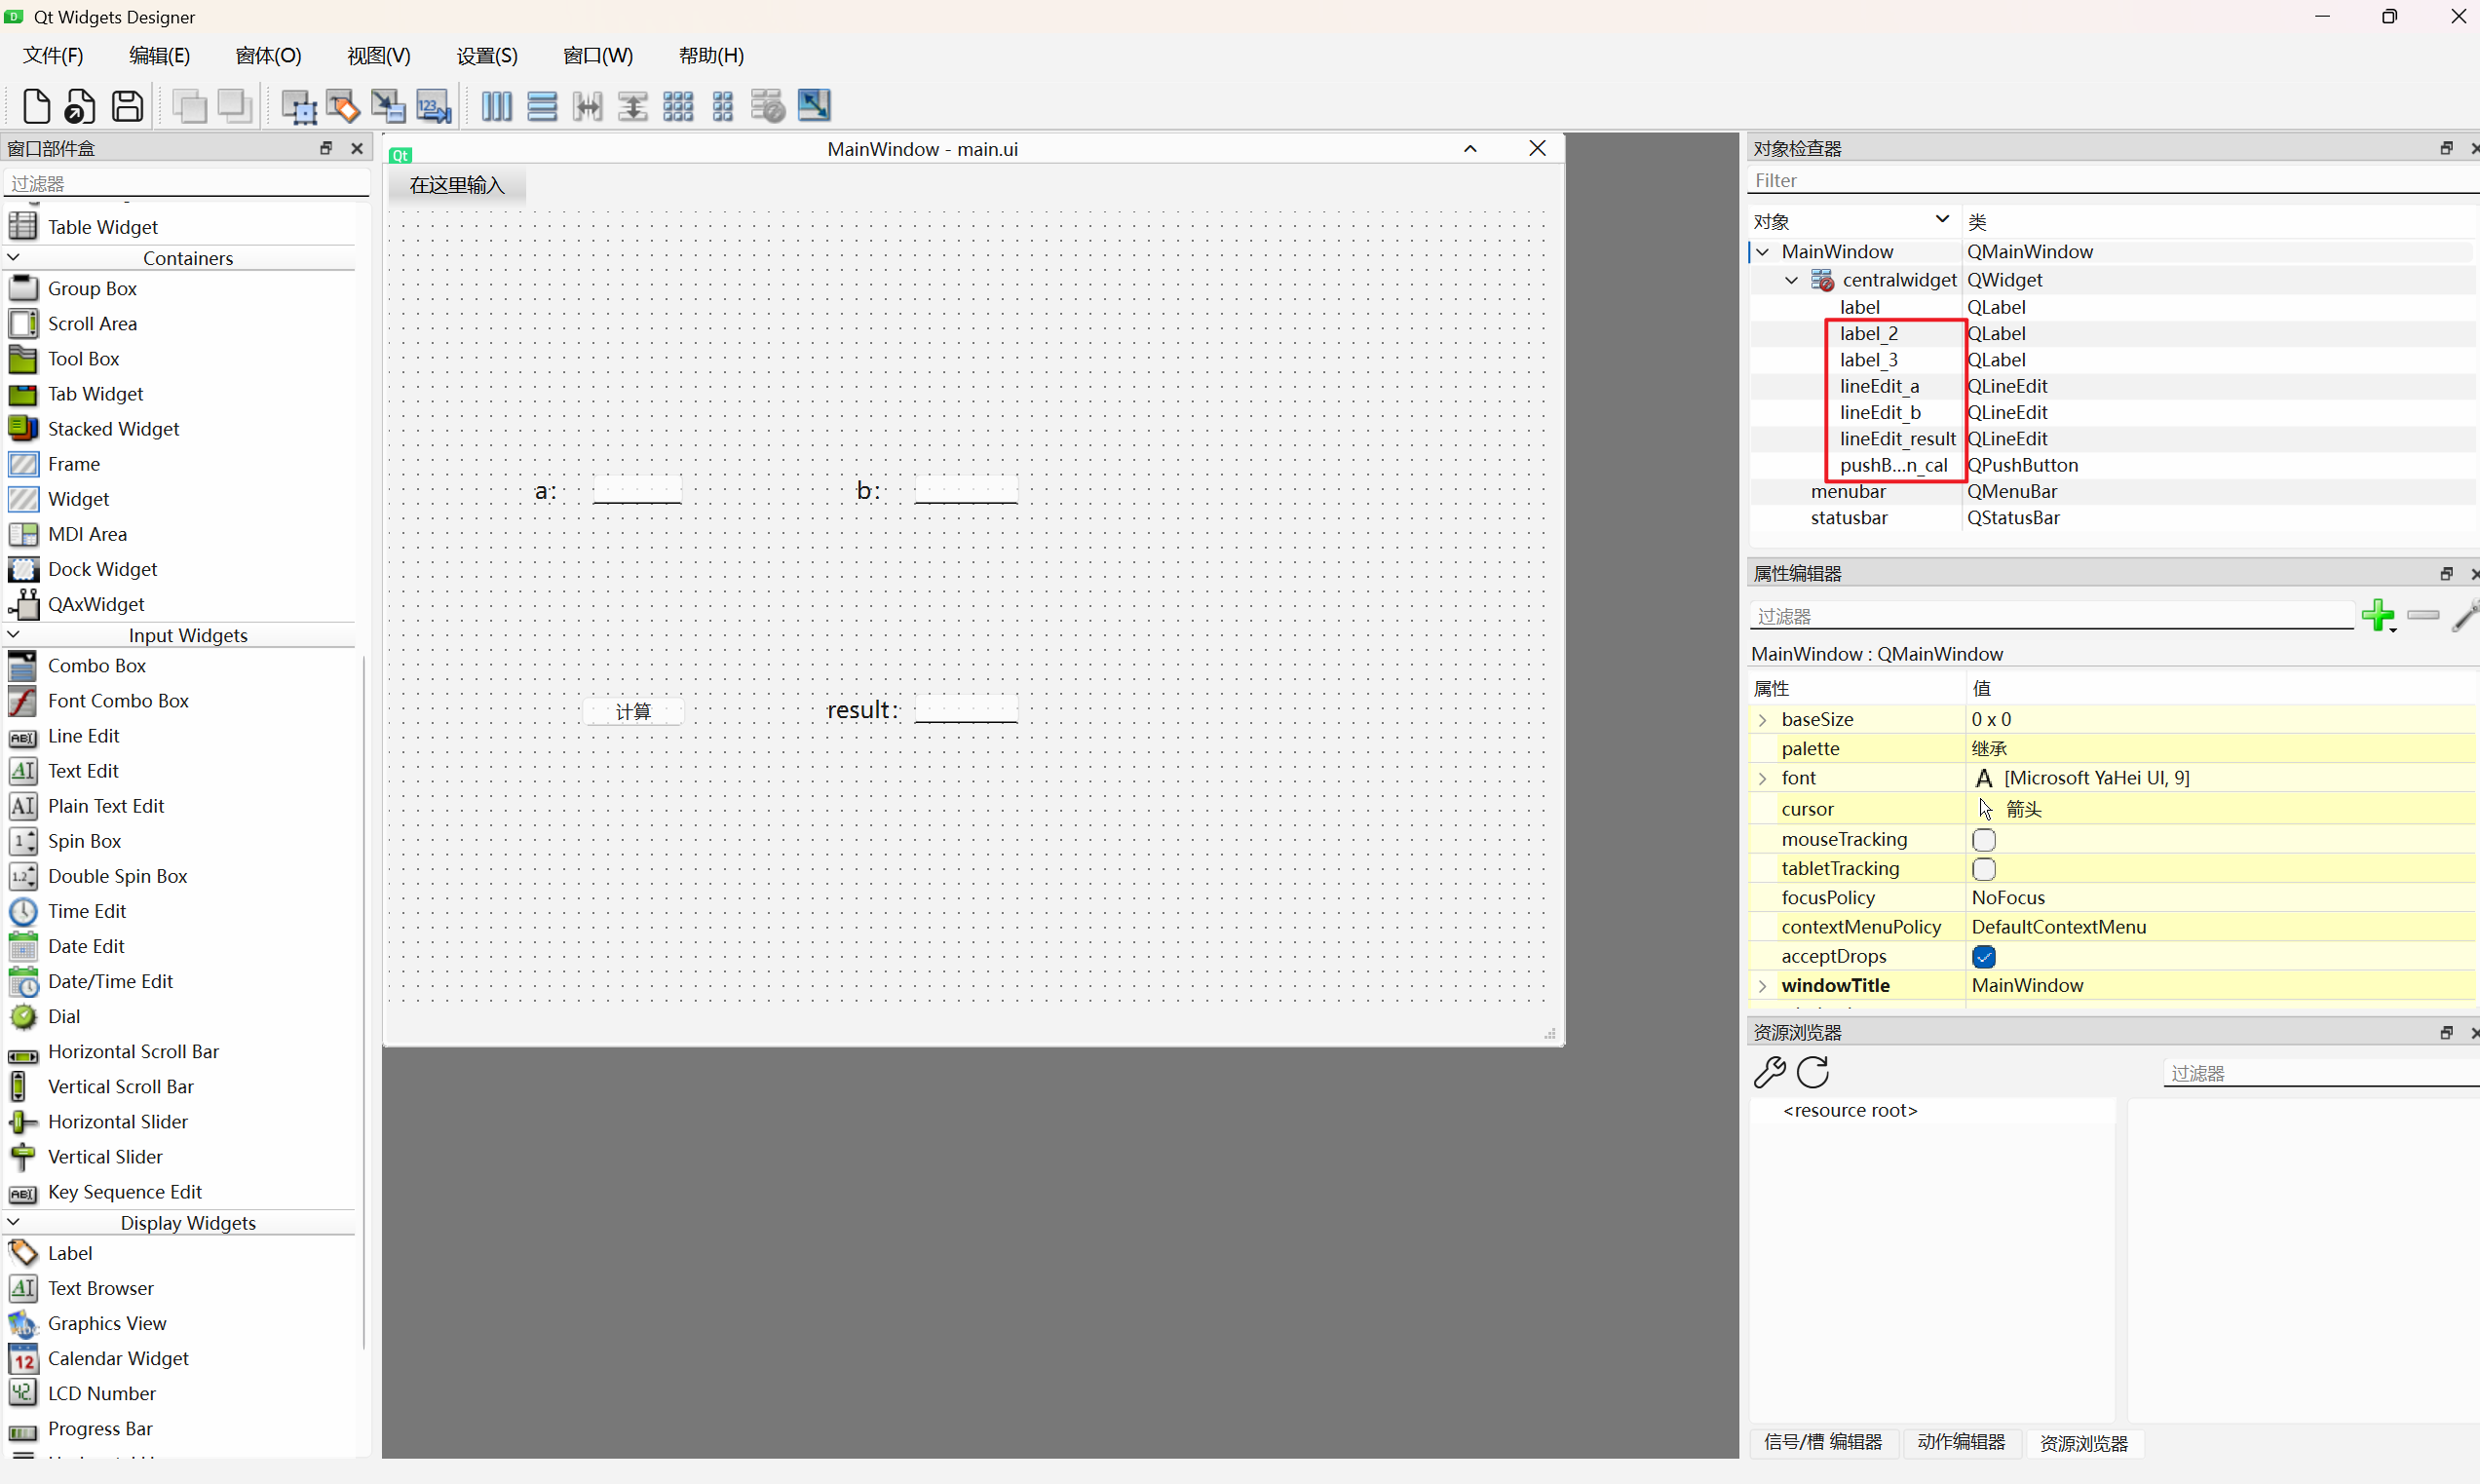
Tip
在qt designer界面设计界面时,可以在键盘上按Ctrl+R,进行界面预览。
将界面文件main.ui保存在ui文件夹下,同目录中会伴随生成一个py文件main_ui.py,这时项目文件的结构是这样的:
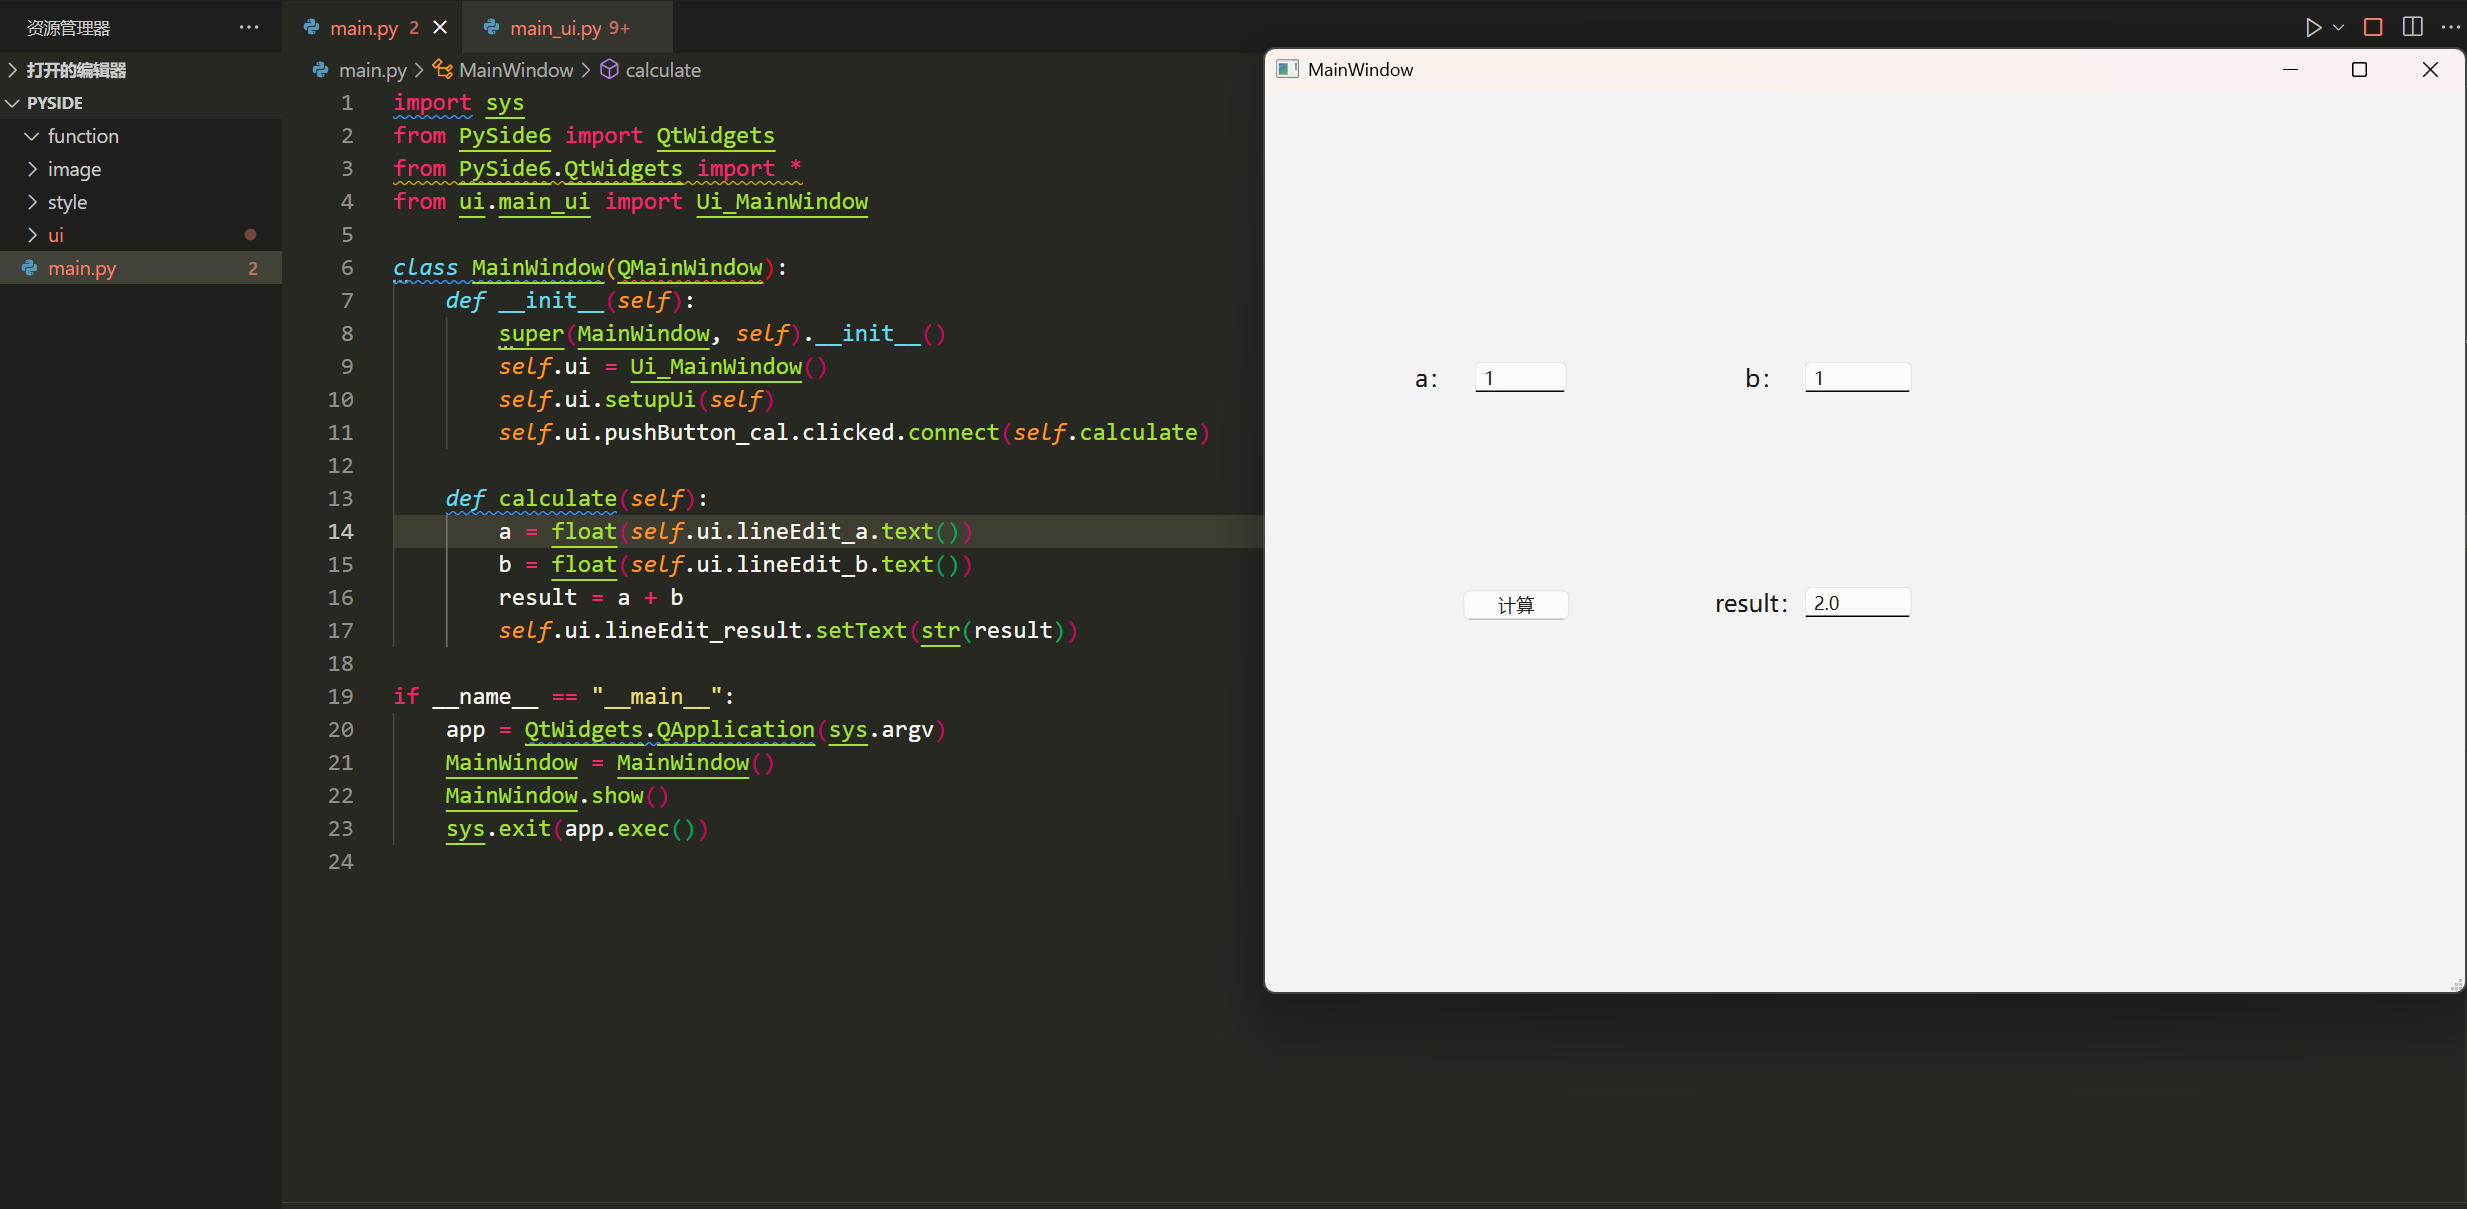
ui设计完毕后,接下来就是设计逻辑程序了,在QT中学术用语:信号与槽。大意就是当用户操作控件时,比如点击“计算”按钮,可以使哪些文本输入框参与计算,并返回到哪个输出区域。
在目录中新建一个main.py文件,以后在vscode主要是运行该文件。
import sys
from PySide6 import QtWidgets
from PySide6.QtWidgets import *
from ui.main_ui import Ui_MainWindow # Import the generated UI file

class MainWindow(QMainWindow):
    def __init__(self):
        super(MainWindow, self).__init__()
        self.ui = Ui_MainWindow()
        self.ui.setupUi(self)
        self.ui.pushButton_cal.clicked.connect(self.calculate) # Connect the button to the calculate function

    def calculate(self):
        # Get the values from the line edits
        a = float(self.ui.lineEdit_a.text())
        b = float(self.ui.lineEdit_b.text())
        result = a + b
        self.ui.lineEdit_result.setText(str(result))

if __name__ == "__main__":
    app = QtWidgets.QApplication(sys.argv)
    MainWindow = MainWindow()
    MainWindow.show()
    sys.exit(app.exec())
运行程序后,就可以看到刚刚设计好的APP界面,在参数a和参数b输入框中试一下,点击计算,可以顺利完成函数calculate的逻辑
此时的项目文件结构:
📦PySide
 ┣ 📂function
 ┣ 📂image
 ┣ 📂style
 ┣ 📂ui
 ┃ ┣ 📂__pycache__
 ┃ ┃ ┗ 📜main_ui.cpython-311.pyc
 ┃ ┣ 📜main.ui
 ┃ ┗ 📜main_ui.py
 ┗ 📜main.py
界面与逻辑分离
含有控件的代码成为界面代码,实现控件动作的代码称为逻辑代码,在每次保存ui文件时,界面代码都会刷新,所以不建议在界面代码中人为添加代码,可将两者进行分离,每次修改只需要在逻辑代码中修改即可。
上一节的案例中已经实现了界面与逻辑分离,在软件设计后期中,控件繁多,信号与槽的连接关系也较为复杂,可以单独将逻辑代码放在一个文件夹中,命名为signal.py,文件结构中的function文件夹正是此意。此时main.py和signal.py里面的代码可以改写为:
import sys
from PySide6 import QtWidgets
from PySide6.QtWidgets import *
from ui.main_ui import Ui_MainWindow # Import the generated UI file

class MainWindow(QMainWindow):
    def __init__(self):
        super(MainWindow, self).__init__()
        self.ui = Ui_MainWindow()
        self.ui.setupUi(self)
        self.ui.pushButton_cal.clicked.connect(self.calculate) # Connect the button to the calculate function

    def calculate(self):
        # Get the values from the line edits
        a = float(self.ui.lineEdit_a.text())
        b = float(self.ui.lineEdit_b.text())
        result = a + b
        self.ui.lineEdit_result.setText(str(result))
现在再在vscode中看main.py函数是不是简洁许多,此时的项目结构:
📦PySide
 ┣ 📂function
 ┃ ┣ 📂__pycache__
 ┃ ┃ ┗ 📜signal.cpython-311.pyc
 ┃ ┗ 📜signal.py
 ┣ 📂image
 ┣ 📂style
 ┣ 📂ui
 ┃ ┣ 📂__pycache__
 ┃ ┃ ┗ 📜main_ui.cpython-311.pyc
 ┃ ┣ 📜main.ui
 ┃ ┗ 📜main_ui.py
 ┗ 📜main.py
添加图标
现在为刚刚设计的APP添加一些个性化的图标吧~
需要引入资源文件的概念,在qt中图片和图标都称为资源文件,文件后缀为.qrc,流程是新建qrc文件,进行添加图片元素,然后编译为py文件,经过前面环境配置中的步骤,可以自动编译为py文件,可以自动导入界面代码中。这里推荐一个图标库—阿里巴巴矢量图标库,里面有海量好看的图标,可以直接下载使用。
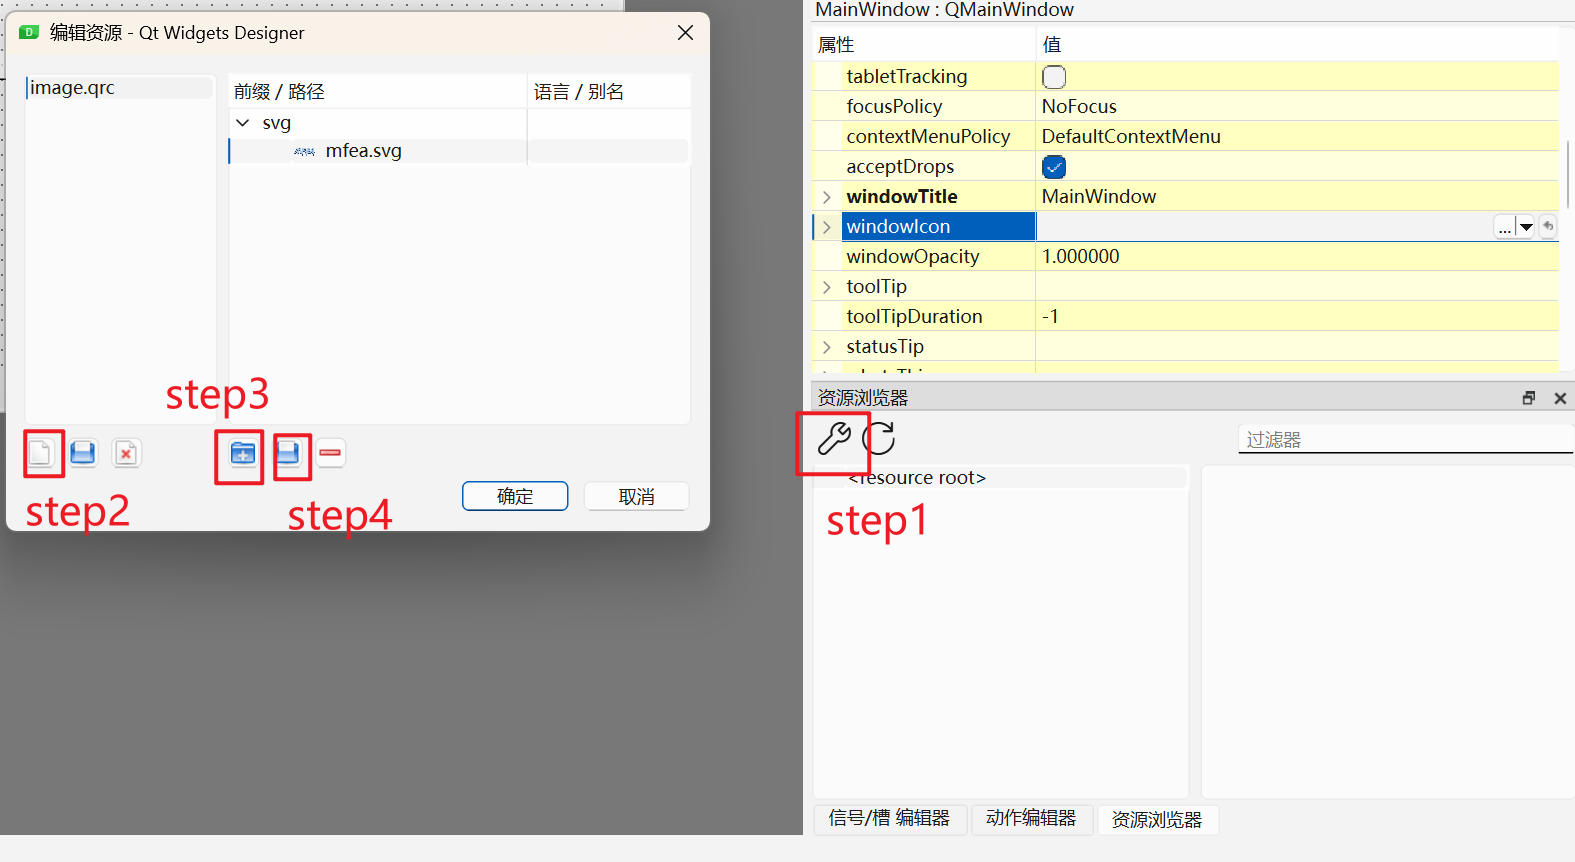
Tip
保存后会在界面代码中自动生成:import image_rc,但是我们已经将image_rc.py放在image文件夹下(项目整体看上去美观简洁),这就需要每次更改资源文件时,需要在界面代码中将import image_rc修改为import image.image_rc,我感觉应该是可以通过修改配置将这个过程自动化的,但是目前来说我不会…
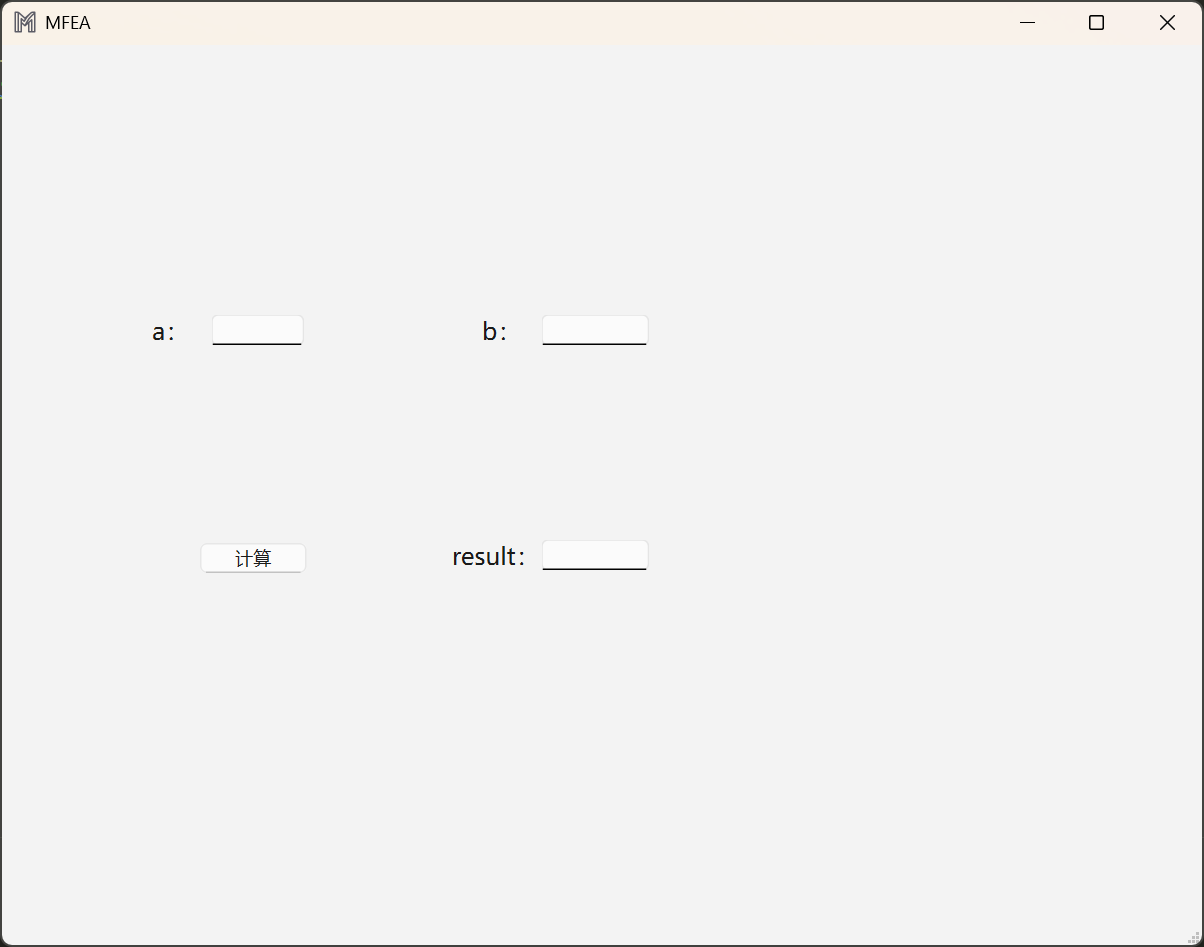
运行main.py,可以看到刚刚设计的APP图标:
程序打包
当我们把程序设计完毕时,可以通过运行main.py,当我们想要把这份软件传给别人时,别人的设备不一定有Python或者一些必要的库,这时可以将整套程序打包为exe文件进行传输。
常见的打包工具有py2exe、pyinstaller、ce_Freeze和nuitka,以最常见的pyinstaller为例。
- 安装pyinstaller:
pip install pyinstaller - 在目录中新建一个文件夹:installer,将主程序、窗体文件、资源文件所有都复制进来
- 进行编译,可以在命令行窗口中操作,也可以单独编制程序进行运行,更方便,这里选择后者:
生成的exe文件位于dist文件夹下,点击main.exe运行后可能会闪退,直接看不出来什么报错信息,这时可以在命令行运行main.exe程序,会发现不能识别
import subprocess import os main = "main.py" # 主程序py文件 path = "E:\\PyMFEAOOP\\installer" # 主程序所在的路径 os.chdir(path) # 将主程序文件路径设置为当前工作路径 icon_path = "E:\\PyMFEAOOP\\installer\\image\\logo.ico" # 图标文件路径 exe_name = "PyMFEA" cmd = [ "pyinstaller", "--onefile", # 打包成单个可执行文件 # "--noconsole", # 不显示控制台页面 "--clean", # 清理旧的文件 "--upx-dir=D:\\APP\\UPX\\upx-4.2.4-win64\\upx", # 使用 UPX 压缩,可以减少最终产生exe文件的大小 f"--icon={icon_path}", # 设置应用程序图标 f"--name={exe_name}", # 自定义生成的 exe 文件名 "--paths=src", # 指定额外的路径,确保 PyInstaller 查找 src 文件夹中的模块 main ] # 使用 subprocess.run() 执行命令并捕获输出 try: result = subprocess.run(cmd, capture_output=True, text=True, check=True) print(result.stdout) # 打印标准输出 if result.stderr: print(result.stderr) # 打印标准错误输出(如果有的话) except subprocess.CalledProcessError as e: print(f"打包过程中发生错误: {e}") print(f"标准输出: {e.stdout}") print(f"标准错误输出: {e.stderr}")image_rc,明明已经在界面代码中修改为image.image_rc,还是不行,这时可以直接将image_rc.py拖出来,放在与main同级别的目录下,再次打包程序,即可成功运行:
可以发现exe运行时,后面会有一个命令行窗口,是不是有点类似Abaqus的运行机制。在传输到其他设备时,只需将文件夹dist、build和文件main.spec一并发送即可。
qss界面美化
使用qss模板
qss(Qt Style Sheets),用于美化Qt程序界面,类似于CSS。这里我选用网上较为流行的qss模板:QDarkStyleSheet。
- 安装库:
pip install qdarkstyle main.py导入:- 加载QSS样式:
可以看到界面的变化:
自定义qss文件
如果想要更加灵活的修改qt的样式,可以通过自定义qss文件的形式,可先在官网了解基本语法:Customizing Qt Widgets Using Style Sheets和Qt Style Sheets Reference。
假设已经有了定制的qss样式文件style.qss,可放在之前预留好的style目录下,在main.py进行导入:
import sys
from PySide6 import QtWidgets
from PySide6.QtWidgets import *
from function.signal import MainWindow

class QSSLoader:
    def __init__(self):
        pass

    @staticmethod
    def read_qss_file(qss_file_name):
        with open(qss_file_name, "r", encoding="UTF-8") as file:
            return file.read()

if __name__ == "__main__":
    app = QtWidgets.QApplication(sys.argv)
    mainWindow = MainWindow()
    qss = QSSLoader.read_qss_file("style/style.qss")
    mainWindow.setStyleSheet(qss)
    mainWindow.show()
    sys.exit(app.exec())